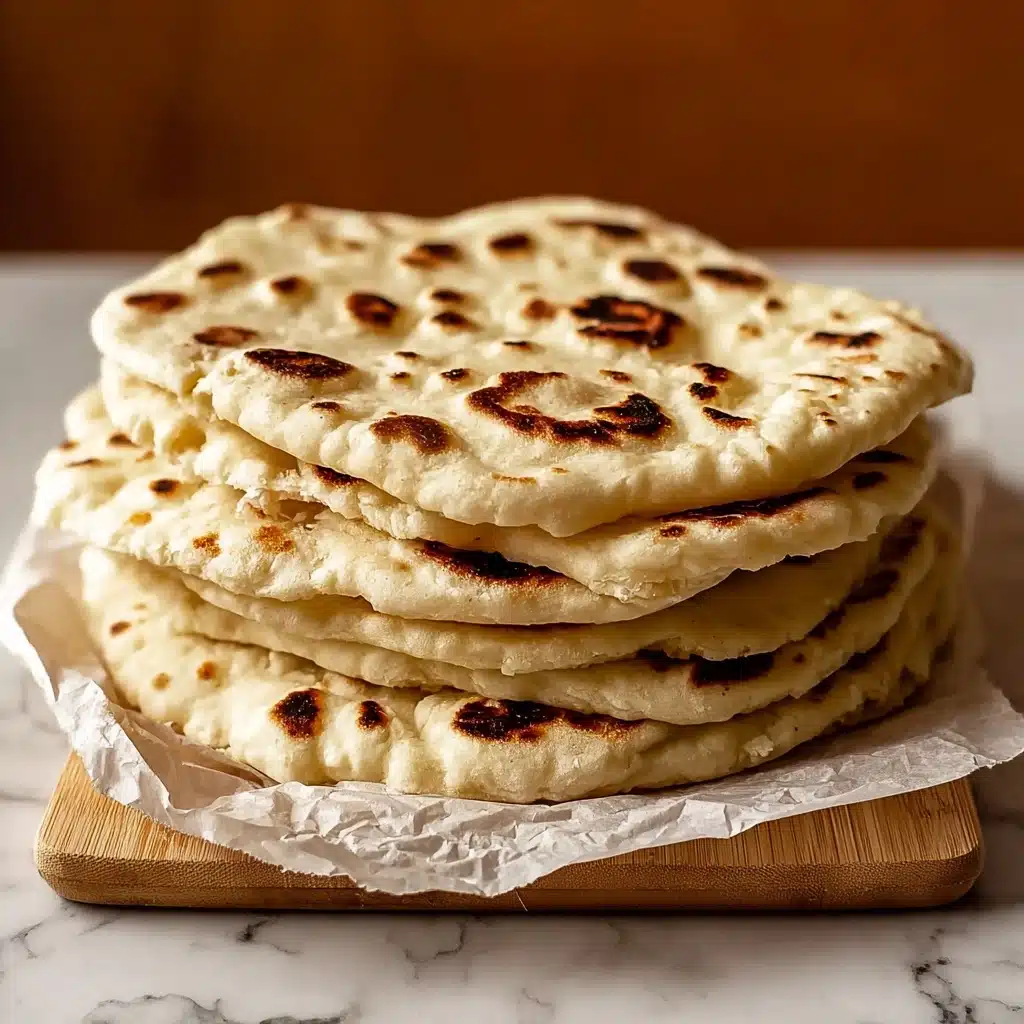
Few things beat the warm, pillowy comfort of freshly baked pita bread, and this Vegetarian recipe delivers pure homemade magic with minimal fuss. Each round is soft, slightly chewy, and ready to cradle your favorite dips, spreads, or fillings. Whether you’re assembling a robust falafel sandwich or just swiping up some velvety hummus, these pitas bring unbeatable freshness to the table—once you try them, you’ll wonder how you ever settled for the store-bought kind!
Ingredients You’ll Need
Ingredients You’ll Need
Making irresistible Vegetarian pita bread at home is delightfully simple—the secret lies in everyday pantry ingredients that turn into something extraordinary. Each element plays an important role in achieving that unmistakable texture and flavor, so let’s take a closer look at what you need!
- All-purpose flour: The backbone of this bread, it provides the structure and ensures a soft, tender crumb; sift it for best results.
- Active dry yeast: Essential for getting the pitas to rise and puff up in the pan; make sure it’s fresh for best leavening.
- Kosher salt: A must for building flavor and balancing all the other ingredients; don’t skip it!
- Warm milk: Adds a touch of richness to the Vegetarian dough; ensure it’s just warm to the touch, never hot.
- Warm water: Helps activate the yeast and brings the dough together smoothly—again, gentle warmth is key.
- Olive oil: Adds lovely flavor and helps keep the dough ultra-soft; you’ll also use it for cooking in the pan.
- Melted garlic and herb butter (optional): Brush this over freshly cooked pitas for a decadent, fragrant finish—totally irresistible!
How to Make Vegetarian
Step 1: Mix the Dry Ingredients
Start by combining your all-purpose flour, active dry yeast, and kosher salt in a large mixing bowl. Mix everything vigorously to ensure the yeast and salt are evenly distributed throughout the flour. This step is essential for getting a fully flavored, nicely risen Vegetarian dough; don’t be afraid to use your hands for a good mix!
Step 2: Add the Liquids and Form the Dough
Pour in your warm milk and warm water, and start stirring. As soon as the mixture comes together, add the olive oil. Get in there with your hands—it’s the best way to feel the dough’s texture evolving. Knead for a few minutes until a smooth, slightly tacky ball forms; this builds up gluten and sets the stage for your perfect Vegetarian pita structure.
Step 3: First Rise
Lightly oil a clean bowl and transfer the dough in. Swirl it around so all sides are coated in oil—this keeps the surface soft and prevents sticking. Cover tightly with plastic wrap and let it rest at room temperature for about an hour, or until the Vegetarian dough has doubled in size. This patient resting time is the secret to pillowy, flavorful bread!
Step 4: Shape the Pitas
Flour your work surface generously and gently punch down the risen dough. Turn it out and divide into 8 equal pieces—think golf balls. Take each and shape it into a small circle, then roll each out to about 1/4-inch thick and 7 to 8 inches wide. Try to keep them even for uniform puffing and the best classic Vegetarian pita appearance.
Step 5: Cook the Pitas
Heat a cast iron skillet or heavy-bottomed pan to high heat and brush on a touch of olive oil. Add one dough round at a time—watch as it bubbles and puffs up! After about a minute, drizzle a bit more oil, flip, and cook for another minute or so until golden and cooked through. Repeat with the remaining rounds, covering each warm Vegetarian pita bread with a kitchen towel to keep them perfectly soft.
Step 6: Optional Finishing Touch
If you want to take things to the next level, brush the warm pitas with melted garlic and herb butter right after cooking. This adds a golden shine and irresistible aroma—pure Vegetarian bliss!
How to Serve Vegetarian
Garnishes
Nothing brings out the personality of fresh pita like a simple garnish! Spritz warm pitas with olive oil and a sprinkle of flaky sea salt, or dust them with za’atar or sumac for a Middle Eastern touch. For a beautiful finish, scatter a few chopped fresh herbs (think parsley or cilantro) across the top—this adds color, fragrance, and a little bit of drama to your Vegetarian table.
Side Dishes
These pitas are fantastic alongside a rainbow of Vegetarian favorites: serve them with creamy hummus, tangy baba ganoush, crisp tabbouleh, or your favorite marinated olives. If you’re feeling adventurous, try stuffing them with roasted veggies or smoky grilled halloumi for a hearty, satisfying meal. The light chewiness works wonders with anything saucy and bold!
Creative Ways to Present
Turn your homemade pitas into the star of the table! Stack them on a rustic wooden board with bowls of dips and spreads for a DIY sharing platter, or slice into triangles and toast for crunchy pita chips. For a playful twist, cut the Vegetarian bread into mini rounds for kid-friendly lunchbox sandwiches or tapas-style bites.
Make Ahead and Storage
Storing Leftovers
Keep any leftover pita fresh by letting them cool completely, then storing in an airtight bag or container at room temperature for up to two days. They’ll maintain that signature softness and be just as delicious reheated, making this Vegetarian recipe perfect for meal prep!
Freezing
For longer storage, pop cooled pitas into a freezer-safe bag with a bit of parchment between each to prevent sticking. They’ll keep beautifully in the freezer for up to two months. Pull out a round or two whenever you’re craving a quick Vegetarian snack or dinner base.
Reheating
To refresh your pitas, simply warm them in a dry skillet for a minute per side or pop them in the oven at 350°F for 3-5 minutes until soft and heated through. A quick spritz of water before reheating will help restore the Vegetarian pita’s signature tenderness.
FAQs
Can I substitute whole wheat flour for all-purpose flour?
Absolutely! You can swap in half whole wheat flour if you’d like a heartier, nuttier flavor and a boost of fiber. Just keep in mind your pitas may be slightly more dense, but still deliciously Vegetarian.
Why didn’t my pitas puff up?
The biggest culprit is underheating the pan or rolling the dough too thin. Make sure your skillet is truly hot before cooking and aim for about 1/4-inch thickness for each round. Fresh yeast and letting your Vegetarian dough rise fully makes a world of difference, too!
Can I make the dough ahead of time?
Yes! You can refrigerate the dough after the first rise for up to 24 hours. Just let it come to room temperature before shaping and cooking. This is a great make-ahead tip for busy Vegetarian households.
How do I keep pita bread soft after cooking?
As soon as each pita comes off the pan, wrap it in a clean kitchen towel—this helps them steam gently and stay pillowy. To keep them ultra-soft for sandwiches and wraps, store them together in an airtight container while still just barely warm.
Is this pita bread vegan?
As written, this Vegetarian pita uses warm milk, which you can easily swap for dairy-free milk if you’d like a totally vegan version. Every other ingredient is already plant-based!
Final Thoughts
There’s nothing quite like tearing into a warm, fresh-from-the-pan pita, and this Vegetarian recipe truly brings bakery-quality bread into your own kitchen. No matter how you serve them, every soft, golden round is guaranteed to wow your tastebuds—and it’s so easy, you’ll find yourself making a second batch before you know it. Give it a try and enjoy the pure joy of homemade bread!
Print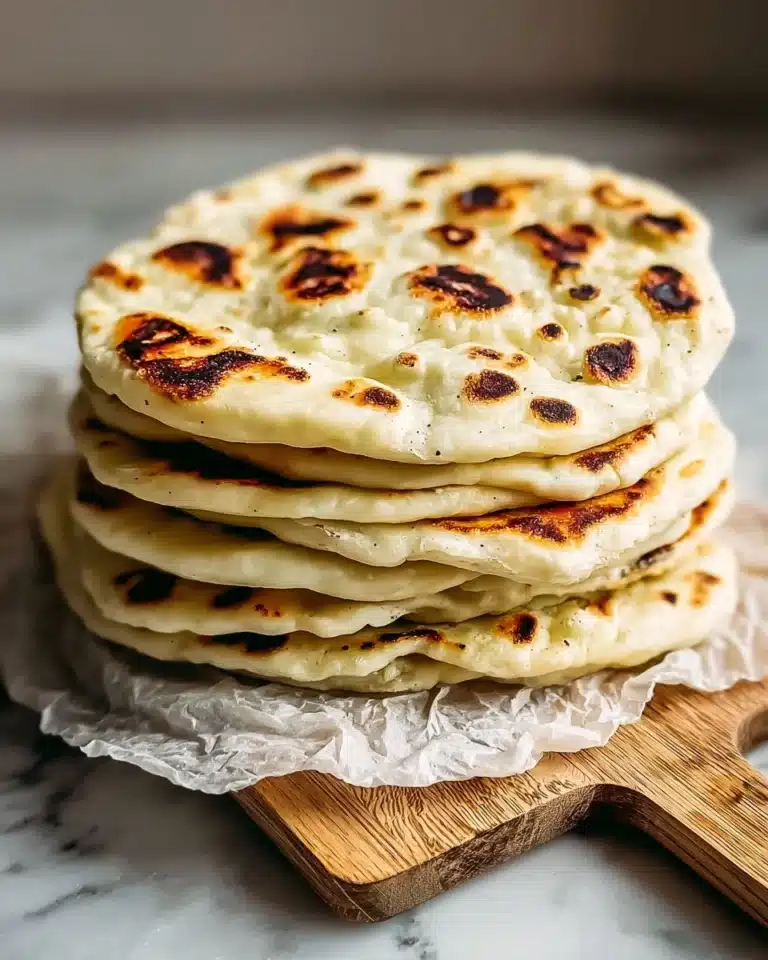
Vegetarian Recipe
Homemade pita bread offers soft, fluffy rounds perfect for dipping, filling, or wrapping. This easy stovetop recipe uses simple ingredients and comes together in just over an hour—no oven required. Customize them with melted herb butter for added flavor, or keep them plain for a classic Middle Eastern touch. Ideal for serving with dips, falafel, or grilled vegetables.
- Total Time: 1 hour 18 minutes
- Yield: 8 pita bread
Ingredients
For the Dough
- 1 ½ cups all-purpose flour, plus more for surface
- 1 tablespoon active dry yeast
- 1 teaspoon kosher salt
For Mixing & Cooking
- ⅓ cup warm milk
- ⅓ cup warm water
- 2 tablespoons olive oil, plus more for the bowl and pan
Optional for Finishing
- Melted garlic and herb butter (optional, for brushing after cooking)
Instructions
- Mix Dry Ingredients: In a large mixing bowl, combine the flour, active dry yeast, and kosher salt. Stir well to distribute the yeast and salt evenly throughout the flour.
- Add Liquids and Form Dough: Pour the warm milk and warm water into the dry ingredients. Stir until a shaggy mixture forms, then add the olive oil. Knead the dough with your hands in the bowl for a few minutes, until it comes together into a soft, cohesive ball.
- First Rise: Lightly oil a clean bowl with olive oil. Transfer the dough into the bowl, turning it to coat all sides with oil. Cover the bowl with plastic wrap and let it rise at room temperature for about 1 hour, or until doubled in size.
- Shape the Pitas: Sprinkle flour on your work surface. Turn the risen dough out and divide it into 8 equal pieces. Shape each piece into a ball, then use a rolling pin to roll each into rounds about 7-8 inches wide and ¼-inch thick.
- Cook the Pitas: Heat a cast iron pan or heavy skillet over high heat. Add 1 teaspoon of olive oil, then place one pita round in the pan. Cook for about 1 minute, until bubbles appear and the underside is golden brown. Drizzle a little oil on top, flip, and cook for another minute until golden on both sides and cooked through. Transfer to a plate and cover with a towel to keep soft. Repeat with the remaining dough rounds.
- Optional Finishing Touch: If desired, brush the warm pitas with melted garlic and herb butter for extra flavor before serving.
Notes
- Ensure both milk and water are warm (not hot) to help activate the yeast without killing it.
- For fluffier pitas, let the dough rise until fully doubled, even if it takes a little longer.
- Keep cooked pitas covered with a clean kitchen towel to retain softness.
- Pitas can be frozen in an airtight bag for up to 2 months; thaw and reheat as needed.
- Swap in whole wheat flour for up to half the all-purpose flour if you want added fiber and a nuttier flavor.
- Prep Time: 10 minutes
- Cook Time: 8 minutes
- Category: Bread
- Method: Stovetop
- Cuisine: Middle Eastern, Mediterranean
- Diet: Vegetarian
Nutrition
- Serving Size: 1 pita bread
- Calories: 124
- Sugar: 1g
- Sodium: 296mg
- Fat: 4g
- Saturated Fat: 1g
- Unsaturated Fat: 3.5g
- Trans Fat: 0g
- Carbohydrates: 19g
- Fiber: 1g
- Protein: 3g
- Cholesterol: 1mg

